 All Bitcoin deals are public, anybody can take a look at them. Whirlpool breaks deterministic links to previous deals and supplies positive privacy. This part of the series shows how to Whirlpool your bitcoin so that you can take actions to protect the censorship-resistant and permissionless qualities of Bitcoin utilizing your own Bitcoin complete node as the personal backend for your Samourai Wallet and Whirlpool GUI.
If you missed out on Parts One and Two of this series, make sure to inspect them out to much better comprehend the real-world ramifications of utilizing Bitcoin with no anonymity-preserving tools, and how to utilize Whirlpool on mobile.
Part 1: A real-world example
Part 2: Whirlpool on mobile
Part 3: Whirlpool on desktop with RoninDojo Tanto (You are here)
Part 4: Whirlpool on desktop with Sparrow Wallet (upcoming)
Method 2: Whirlpool On Desktop With RoninDojo
This area will show how to utilize Whirlpool on desktop with the Whirlpool GUI set up to keep up your own Bitcoin complete node, i.e., the Tanto by RoninDojo This will develop on the details from the last area about utilizing Whirlpool on mobile just.
If you are not running your own Bitcoin node then you are relying on somebody else's. RoninDojo is a totally free and open-source software application (FOSS) designer group focused solely on developing the most steady and customized complete node for Samourai Wallet assistance. With Samourai Wallet and RoninDojo integrated, users are empowered with a mobile-first Bitcoin wallet that includes privacy-enhancing tools like a Whirlpool CoinJoin application and post-mix collective costs tools, all powered by the user's own self-hosted Bitcoin complete node interacting with the mobile customer over Tor. This guide shows establishing a brand-new plug-and-play complete Bitcoin node from RoninDojo called the Tanto.
https://ronindojo.io/en/tanto.html
The Tanto comes preassembled and preloaded with the RoninDojo software application, there is no requirement to construct a product list and order numerous pieces of hardware from several suppliers. The Tanto includes a milled aluminum case and bottom plate, painted black with a streamlined RoninDojo logo design in red. Inside the case, the Tanto is powered by a RockPro64 board, a user interface card, and an M. 2 NVMe 1TB SSD. The Tanto likewise consists of a 32 GB microSD card preloaded with the RoninDojo software application image and power supply. Whatever you require to get going is consisted of.
Additionally, the Tanto consists of the RoninSteel stainless-steel seed expression backup plate. Take a look at this guide to see a presentation of the RoninSteel.
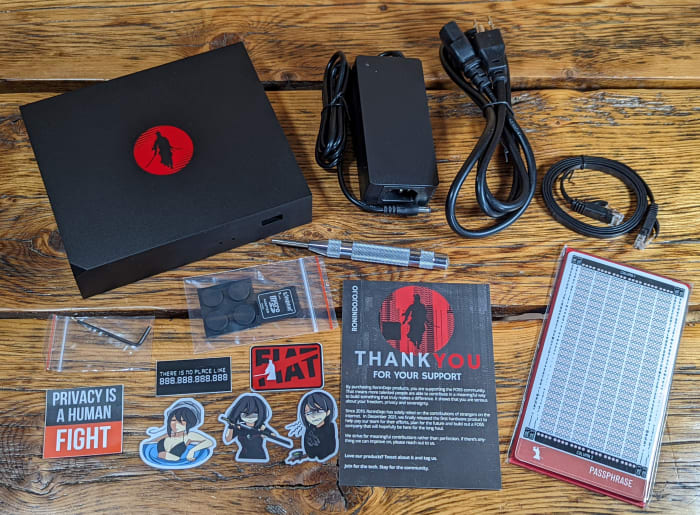
All together the Tanto consists of:
- Aluminum case and bottom plate
- Ronin X4-90 adaptor
- LED stripe with GPIO ports
- Thermo pad, rubber feet, screws, and hex wrench
- RockPro board
- RockPro64 PCIe X4 to M. 2/NGFF NVMe SSD user interface card
- Power supply
- M. 2 SSD M-key, 1TB
- 32 GB microSD card
- RoninSteel backup set
- Spring-loaded punch
- Ethernet cable television
- Sticker pack
- "Thank you" card
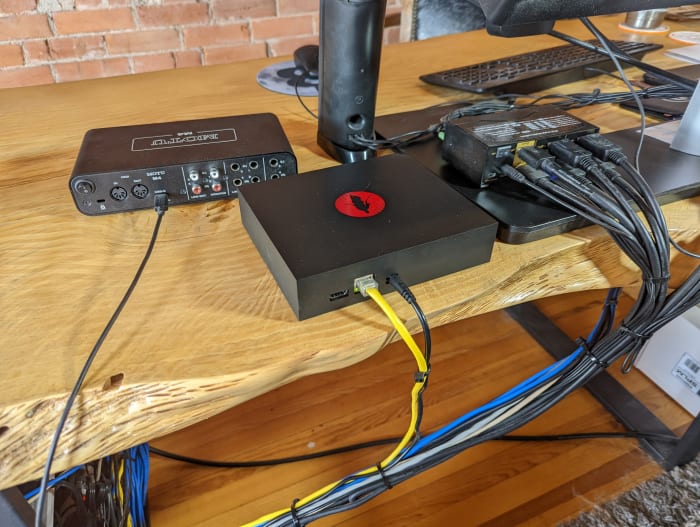
Step 1: Connecting
Connecting the Tanto is really basic:
- Plug one end of an Ethernet cable television into the back of the Tanto.
- Plug the other end of the Ethernet cable television into your router or switch.
- Plug in the power adaptor.
Next, simply plug one end of the power cable television for the consisted of power supply into your outlet and the other end into the transformer.
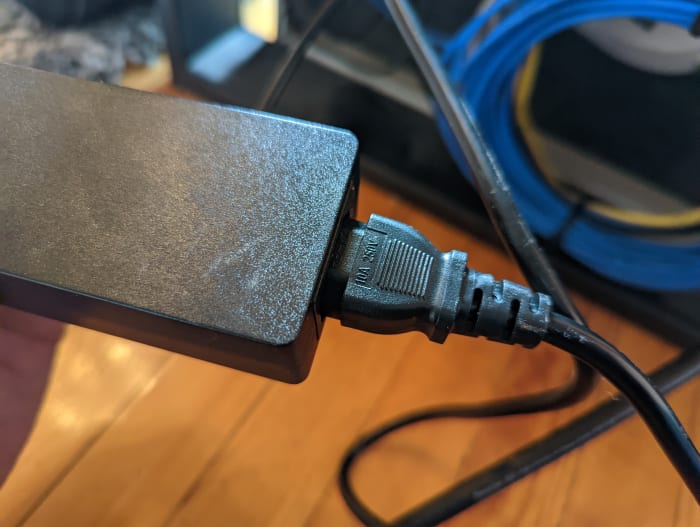
The Tanto will immediately power on and begin the preliminary setup procedure. Make sure that the power is not disrupted throughout the automated preliminary setup procedure. This procedure takes approximately 10 minutes and you will discover the traffic signal brighten below the Tanto as soon as this procedure is ended up. You will be all set to login to the Tanto through the web user interface.
Step 2: Configuring
Configuring the Tanto is likewise extremely simple, it just takes a couple of minutes and the fundamental actions are to set your password, then log in.
Visit the authorities RoninDojo Wiki for comprehensive guidelines and more.
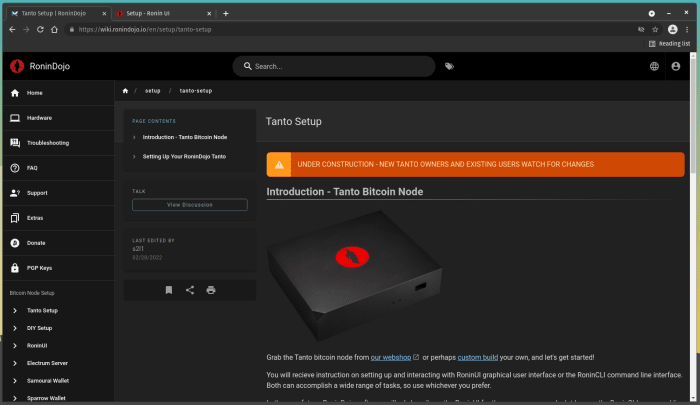
Using a PC linked to the exact same regional network as your Tanto, open your preferred web internet browser and type "https://ronindojo.local" into the URL bar. This ought to raise the RoninDojo welcome page.
If that did not work, then you can attain this exact same procedure by utilizing the regional IP address of your Tanto rather. This IP address can be discovered by logging into your router and inspecting the list of gadgets under the DHCP rents area. Your router must have the regional IP address required to visit, together with the password on a label someplace on the gadget. If not, the instructions are generally quite simple to discover with an online look for your maker's router. Generally, you can simply type "1921680.1" or "1921681.1" or "100.0.1" into your web internet browser which will bring you to your router login page. From there the username/password can differ depending upon maker however they are normally something like "admin/admin" or "admin/1234" or "admin/password." Programs like Angry IP Scanner might be utilized.
In this example, the regional IP address "1921686917" is the one utilized to type into the URL bar.
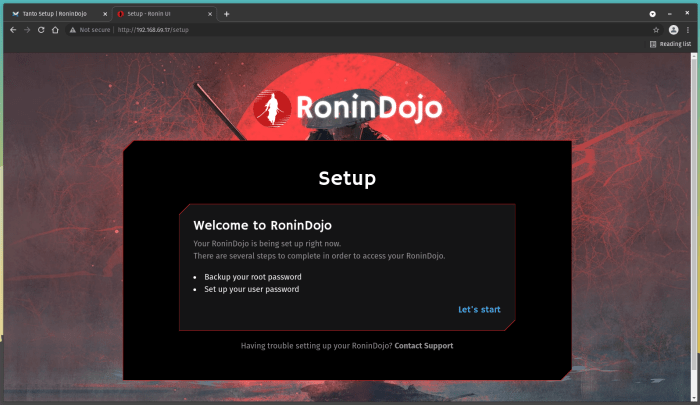
Once you are at the RoninDojo welcome page, choose "Let's begin."
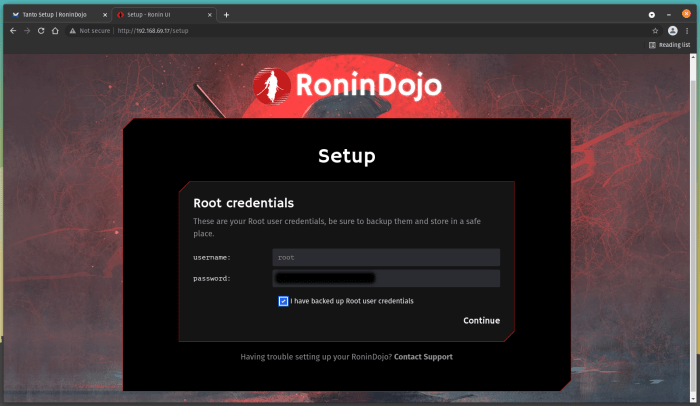
You will exist with your Root qualifications; these resemble the master username and password for the Tanto's backend. Conserve these information in a safe and secure location like a password supervisor and do not share these with anybody for any factor. You can not alter these, they are pre-selected for you. Guarantee that you choose package that states "I have actually supported Root user qualifications," then click "Continue."
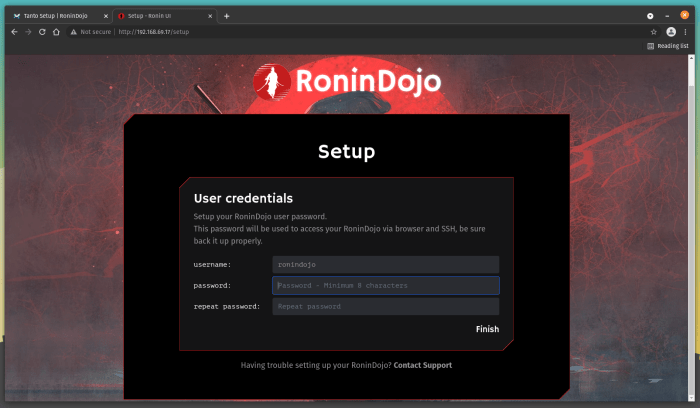
Next, you will set your user qualifications, which you will utilize to access the Tanto through the web user interface. The username is preselected for you, "ronindojo." You can develop any password you want to utilize, simply guarantee it is at least 8 characters. Repeat this password and make certain you protect these qualifications in a safe location, like a password supervisor, and do not share them with anybody for any factor. Click on "Finish."
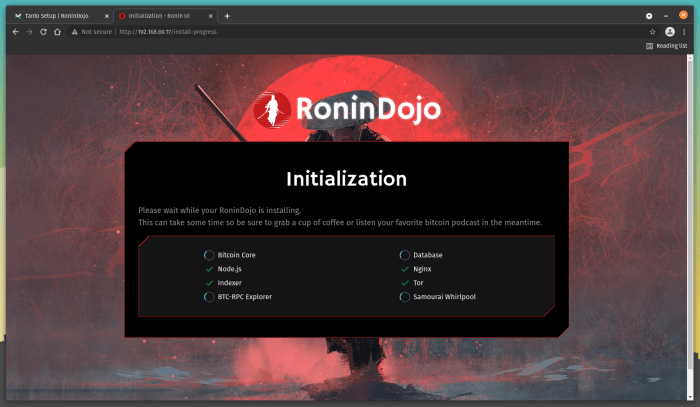
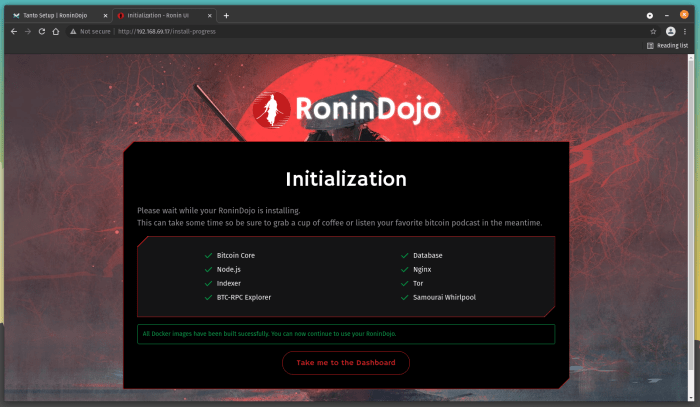
Next, you will see a number of services such as Bitcoin Core, Node.js, Indexer, BTC-RPC Explorer, Database, Nginx, Tor, and Samourai Whirlpool begin. This takes a couple of minutes.
Once there is a green check mark beside each service, you can click the "Take me to the Dashboard" button.
Step 3: Initial Blockchain Download (IBD)
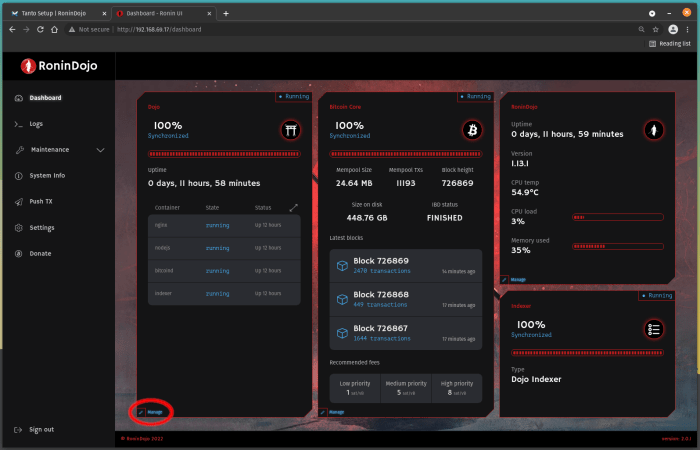
Once you are at your control panel, you can see the development of the Bitcoin IBD and the vitals of your Tanto. The IBD will take about 2 days to finish, as the Tanto is linking to other Bitcoin nodes and downloading the whole Bitcoin blockchain all the method back to the very first block from January2009 As soon as the IBD finishes, you will have your own complete copy of the blockchain and you will utilize your own copy to confirm your deals versus and show your balances in your mobile wallet.
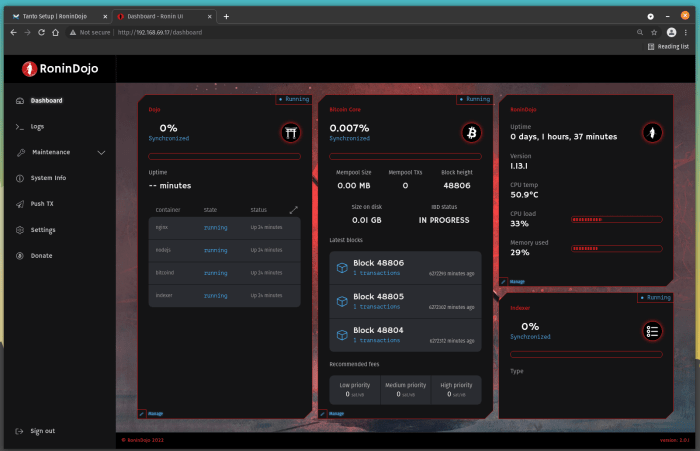
Some other vitals you can keep an eye on are uptime, variation, temperature level, CPU load, and memory use. Let this procedure run for a number of days. Tanto will log you out instantly after some idle time however the procedures continue to run in the background.
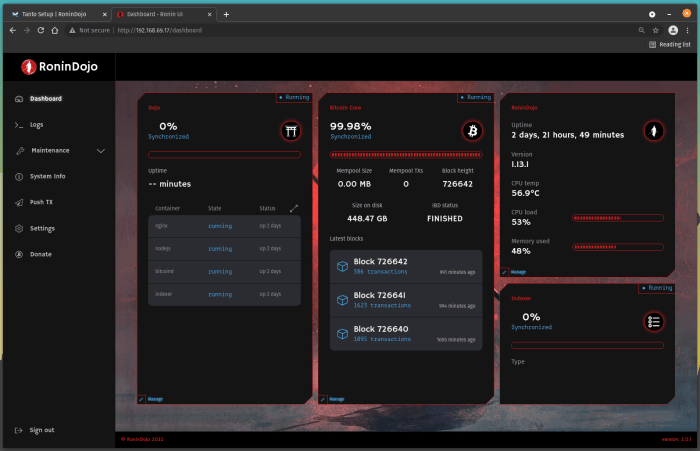
The IBD took an overall of 2 days, 21 hours, 49 minutes in this presentation.
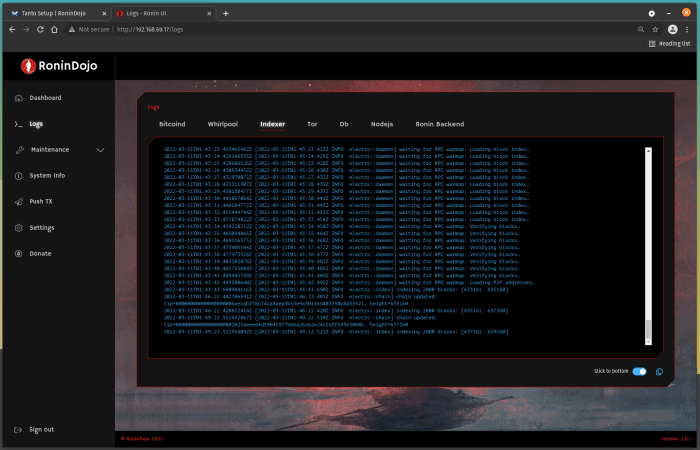
Step 4: Indexing
Now that the whole Bitcoin blockchain has actually been downloaded, it requires to be indexed so that it is searchable. The indexing procedure starts instantly when the IBD is ended up, and this procedure can take an extra day. You might observe that the "Indexer" status in the lower right-hand corner stays on 0%; do not stress! Merely browse to the "Logs" alternative on the left-hand side menu and after that the "Indexer" tab. You ought to see something like this screenshot listed below where the blocks are getting indexed in portions of 2,000 Simply let this procedure go to conclusion, which once again can take another 24 hours.
Once the Indexer has actually reached the current block height, you ought to see both Indexer and Dojo reporting 100% integrated.
Step 5: Connecting To Mobile
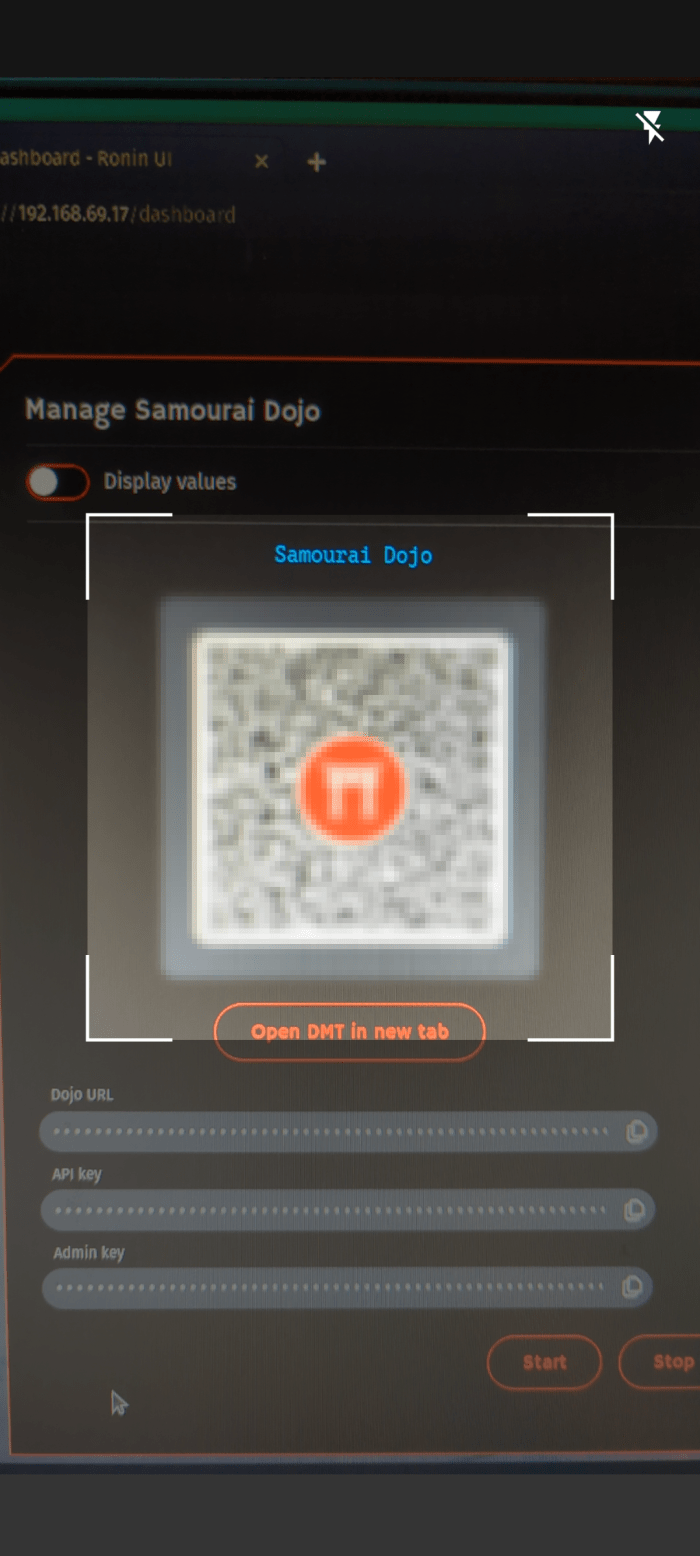
You can click "Manage" in the lower left-hand corner of the "Dojo" window and this will raise the QR code that you can utilize to link your Samourai Wallet. Make certain to toggle "Display worths" to make the QR codes readable. The other QR code is for linking your own BTC-RPC explorer. The explorer offers a method to utilize your own Dojo to feed information to a full-fledged Bitcoin blockchain explorer over Tor. Copy the.onion URL and password for the explorer, paste into Tor Browser, usage "ronindojo" for the username, and bookmark page.
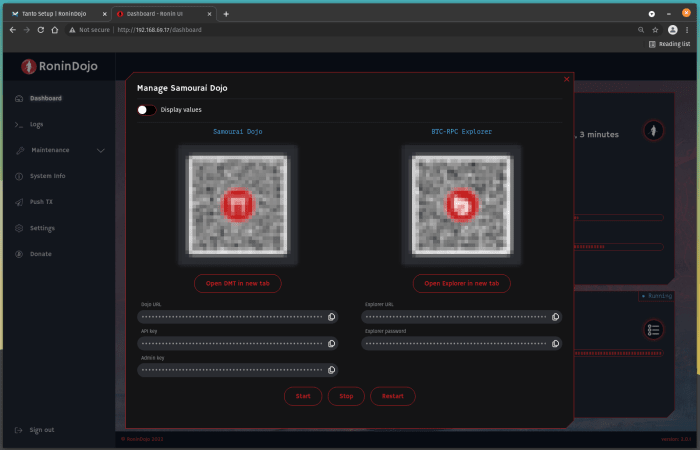
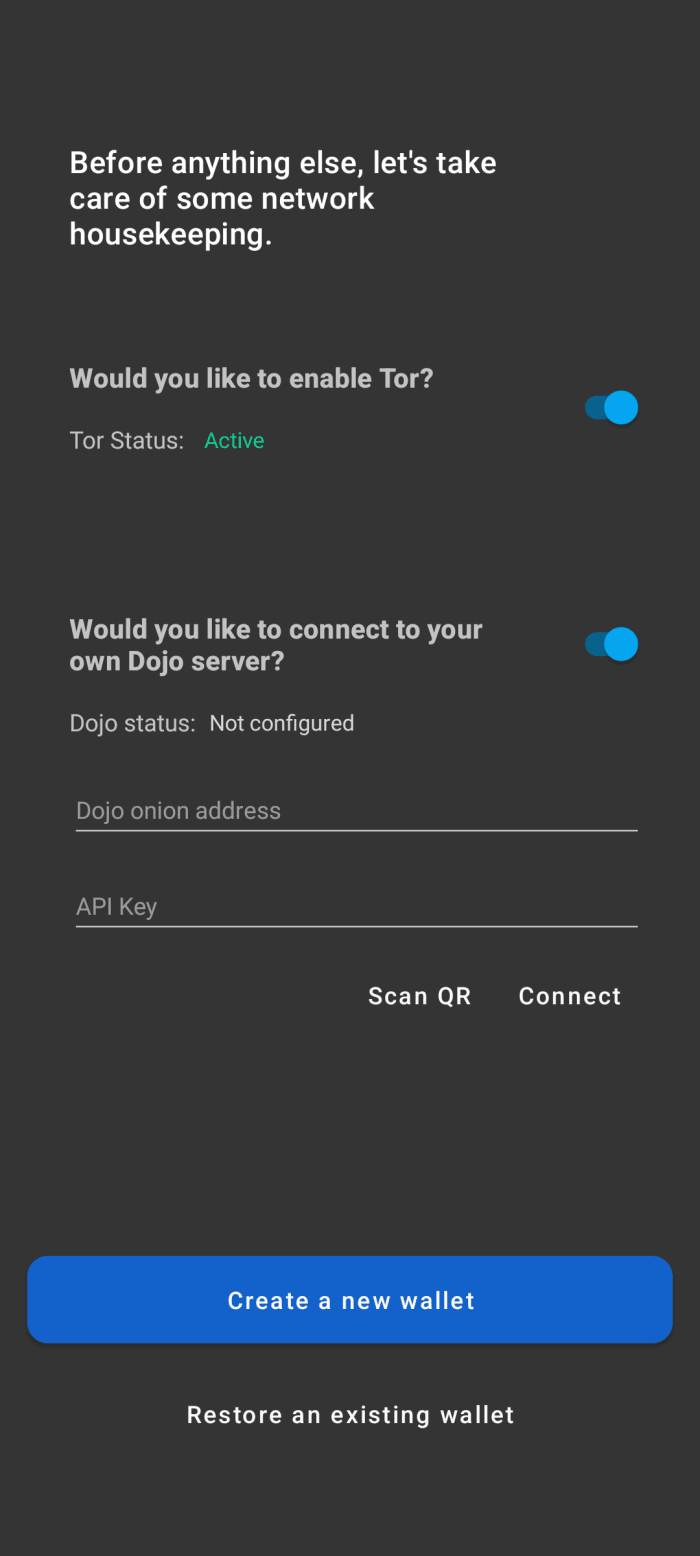
In your Samourai Wallet, from the house screen, press the icon at the top that appears like the WiFi sign. Toggle on the choice to link to your own Dojo. Click on "Scan QR" and the application will ask you to give cam consent. Scan the "Samourai Dojo" QR code in your Tanto control panel from your mobile gadget. Ensure you toggle on the alternative to show worths in your Tanto control panel so the QR code is understandable.
Now your mobile Samourai Wallet will interact with your own complete node. There are a number of other crucial alternatives to review prior to covering the desktop Whirlpool GUI.
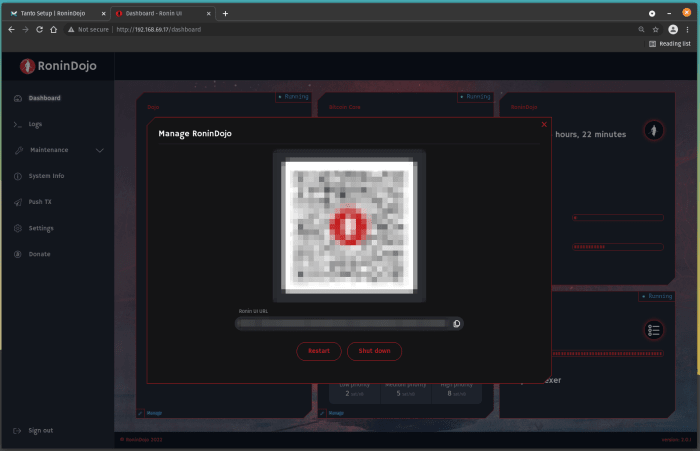
For example, you can log into your RoninDojo interface (UI) from your smart phone with the Tor Browser. From the control panel, click "Manage" in the lower left-hand corner of the "RoninDojo" window. This will raise a QR code that you can scan to follow the.onion link to your RoninDojo UI. Enter your RoninDojo UI password and bookmark this page.
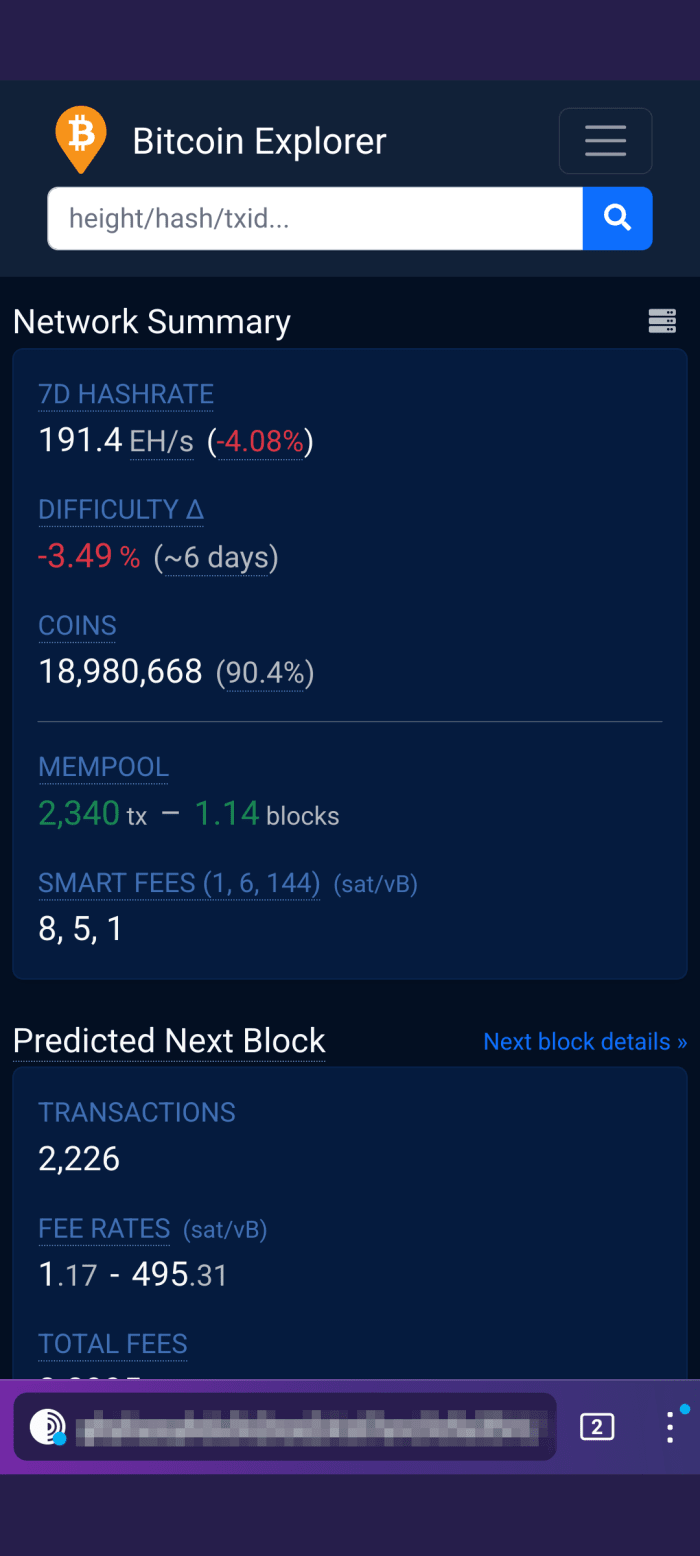
Once you are logged into your RoninDojo UI on mobile, then you can simply copy/paste the.onion URL and password for the explorer into your Tor internet browser. Leave the username blank, you can bookmark this page too and now you have a mobile block explorer that utilizes your own Dojo as a backend and interacts with it by means of Tor.

Step 6: Install The Whirlpool GUI
This area will show how to link the Whirlpool desktop customer to your Tanto complete node and your Samourai Wallet. With this setup, you will have the ability to have your UTXOs blending continuously in the background from your desktop customer and powered by your own complete node.
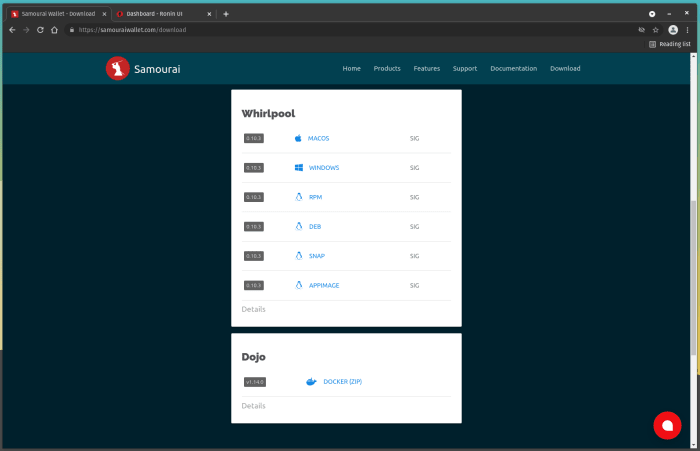
First, you will require to download the Whirlpool customer proper for your os. The various alternatives in addition to accompanying designer signatures can be discovered here and comprehensive setup directions can be discovered here Know you will likely require to set up OpenJDK too, which is covered in the setup guidelines.
* In a future release of the RoninDojo UI, the Whirlpool URL will be offered from the web user interface control panel and you will no longer require to obtain this info from the terminal as shown here. *
Step 7: Connecting Tanto With The Whirlpool GUI
Once you have your Whirlpool customer set up and your Samourai Wallet linked to your RoninDojo Tanto, you can make an SSH connection to the RoninDojo and begin the Whirlpool service. The Whirlpool.onion URL you require is not offered through the RoninDojo interface control panel. The Secure Shell (SSH) connection can be made with the very same username password you utilized for the RoninDojo UI.
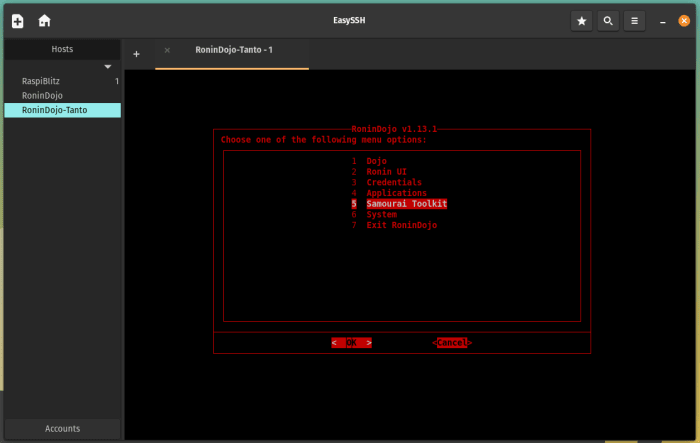
Once linked, browse to "Samourai Toolkit">> "Whirlpool":
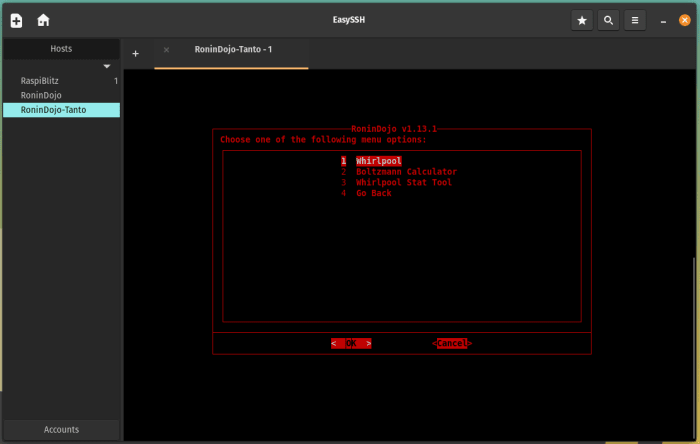
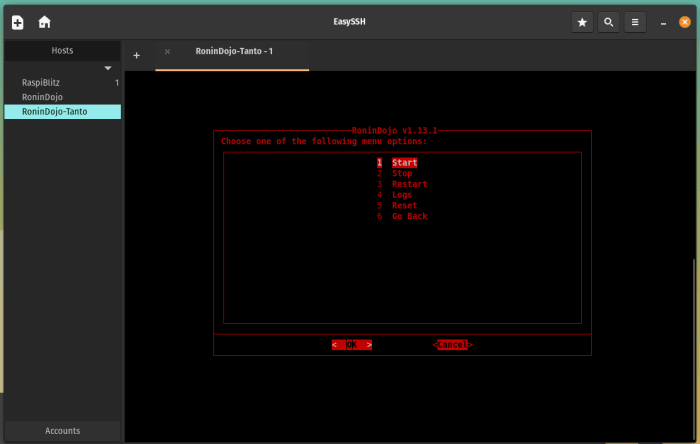
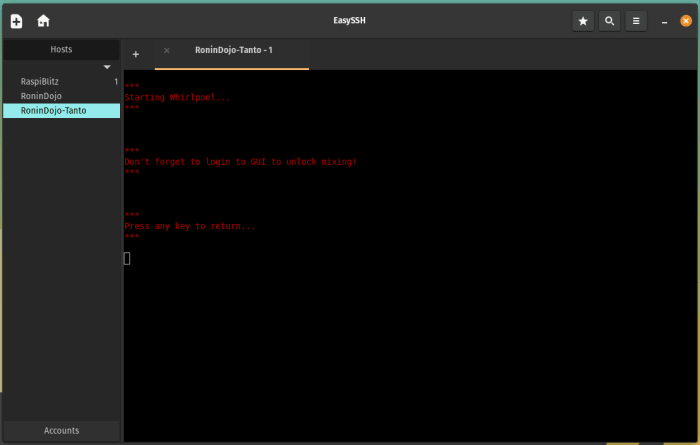
Then choose "start;" a script will run briefly and after that you can strike any crucial to go back to the primary menu when triggered.
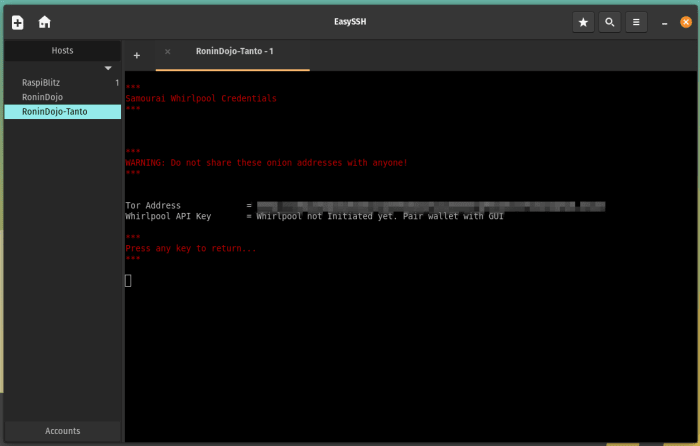
With the Whirlpool service began, and back at the primary menu, now browse to "Credentials">> "Whirlpool."


This is where you can obtain the.onion URL you requ ire to utilize in the Whirlpool customer visual user interface (GUI) to get it set up. Highlight this URL and utilize "ctrl+ shift+ c" to copy it to your clipboard.
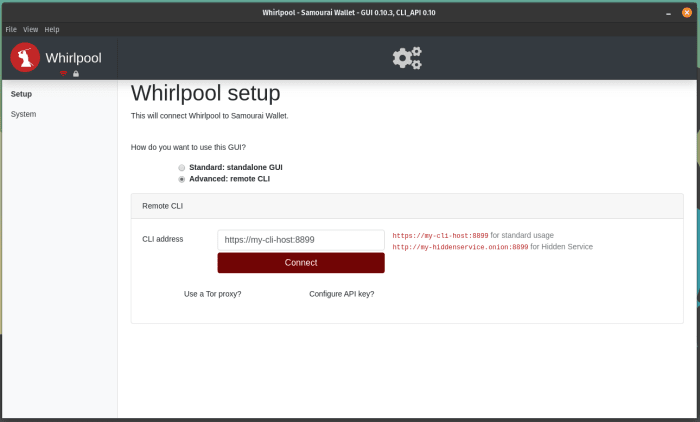
Now open the Whirlpool customer application you set up previously. Select the "Advanced: remote CLI" alternative and where it states "https://my-cli-host: 8899" paste the.onion URL from your RoninDojo terminal. Depending upon whether you are running a Tor daemon or simply the Tor web browser, you might require to choose either "9050" or "9150" for adding the Tor proxy. Leave the API essential blank; this will immediately be managed when initialized. Click on "Connect." Provide the GUI a long time, Tor connections can take a bit. You might require to attempt this a number of times prior to the connection is made.
RoninUI22 png
Step 8: Connecting Samourai Wallet To The Whirlpool GUI
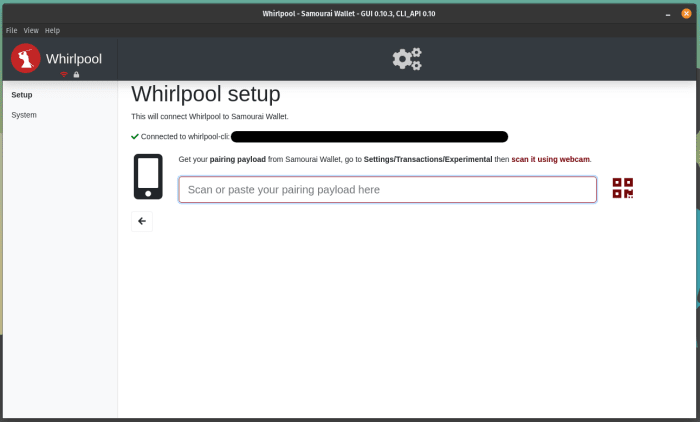
Once the connection is made, you will exist with a screen asking you to input the Whirlpool pairing payload from your Samourai Wallet. In Samourai Wallet, click the 3-dot menu in the upper right-hand corner and choose "Settings">> "Transactions">> "Pair to Whirlpool GUI" at the bottom. This will show a QR code which contains your Whirlpool payload. Just click the QR code alternative in the desktop GUI and this must introduce your cam, then hold up the QR code on your mobile so the electronic camera can scan it.
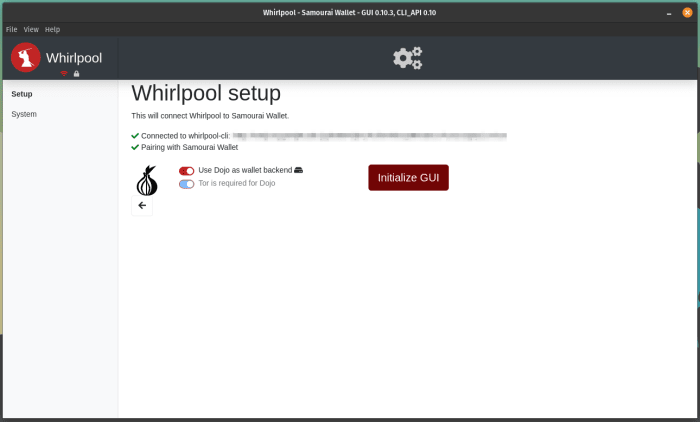
Once got, then click "Initialize GUI."
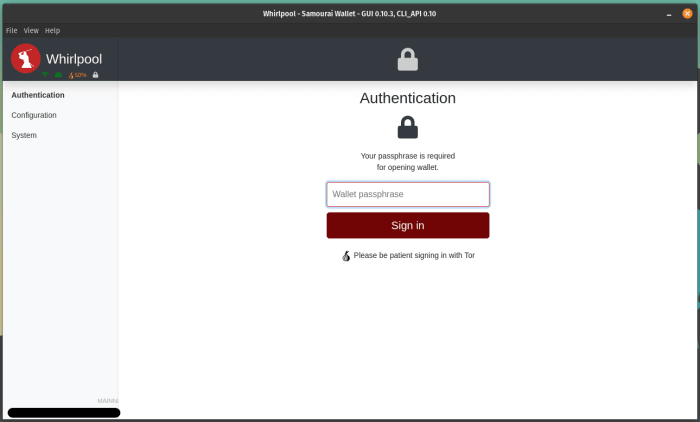
Next, go into the passphrase for your Samourai Wallet and click "Sign in."
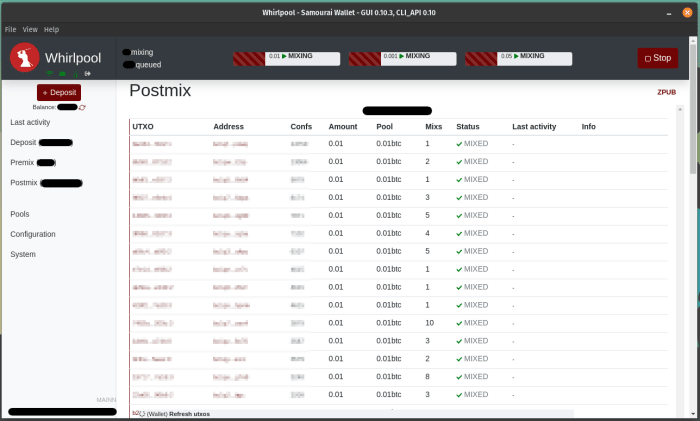
Once checked in, you need to have the ability to see your balances, blending activity, and after that you can set targets for the number of blends you want to attain. You can even create deposit addresses from the Whirlpool GUI.
Now when you start blends from your mobile Samourai Wallet app, you can close the app later on and your UTXOs will continue to be signed up as offered inputs to blends as complimentary riders so long as your desktop customer remains running. Plus this is all being done utilizing your own node as a backend and interacting with it through Tor. Simply follow the precise very same actions as covered in the last area to start Whirlpool blends on mobile like regular.
The next part of this series will show how to utilize Sparrow Wallet and Whirlpool, which is a fantastic option for those who desire the personal privacy maintaining advantages of Whirlpool however do not have an Android mobile phone to set up Samourai Wallet on.
This is a visitor post by Econoalchemist. Viewpoints revealed are totally their own and do not always show those of BTC Inc or Bitcoin Magazine
Read More https://bitcofun.com/how-to-whirlpool-on-desktop-with-ronindojo/?feed_id=17759&_unique_id=626e82a6463e2

No comments:
Post a Comment